嗨,大家好, 今天的这篇文章将为您提供如何在实践中进行自定义布局的分步说明,特别是说明 Magento 页面标题中客户帐户链接的布局更改。
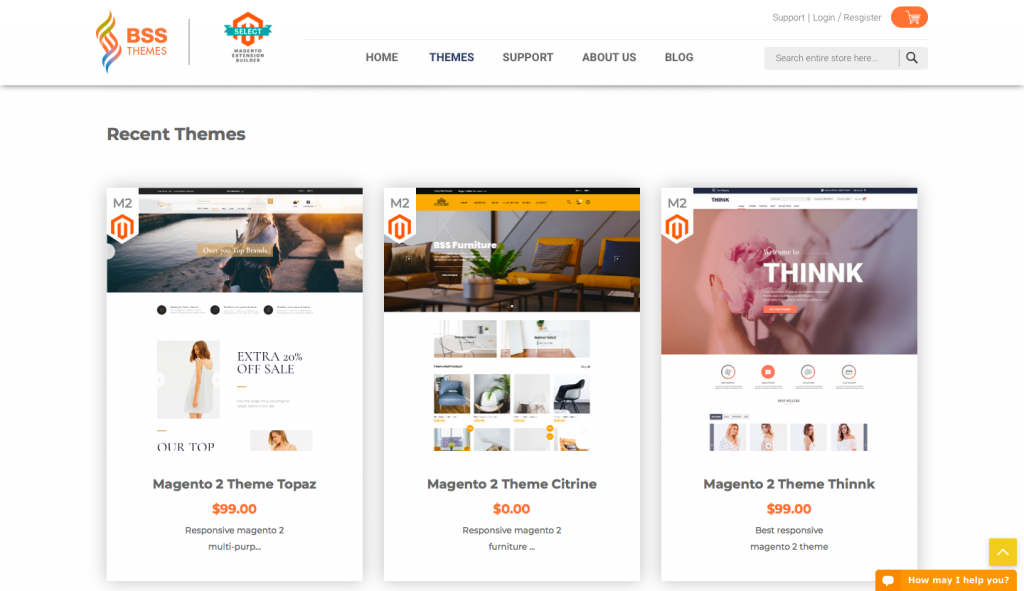
我刚刚创建了一个新主题——Bss 主题,它继承自一个空白主题,并且与下图中的风格相似:
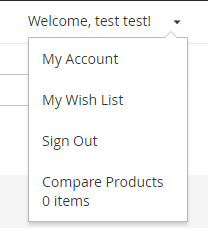
我想将客户帐户链接移至下拉列表,如下所示:
要获得上述结果,您需要执行以下步骤:
第 1 步:定义布局块
Bss 主题应用 Luma 主题:使用描述性方法确定模板、布局和样式位置。该文件负责显示文件中指定的标题链接:<Magento_Theme_module_dir>/view/frontend/layout/default.xml:
<container name="header.panel" label="Page Header Panel" htmlTag="div" htmlClass="panel ">
...
<block class="Magento\Framework\View\Element\Html\Links" name="top.links">
<arguments>
<argument name="css_class" xsi:type="string">header links</argument>
</arguments>
</block>
</container>
其他模块使用此块使用referenceBlock将其特定链接添加到标头。
例如:亮度主题
Luma 主题中的客户模块:使用 move top.links 来阻止客户。
<Magento_luma_theme_dir>/Magento_Theme/layout/default.xml
< referenceBlock name="header.links">
<block class="Magento\Customer\Block\Account\Customer" name="customer" template="account/customer.phtml" before="-"/>
...
< /referenceBlock >
...
< move element="top.links" destination="customer"/>
...
在下拉菜单外的 Luma 主题文件中,添加了一个新块 - header.links。
<Magento_luma_theme_dir>/Magento_Theme/layout/default.xml
<referenceContainer name="header.panel">
<block class="Magento\Framework\View\Element\Html\Links" name="header.links">
<arguments>
<argument name="css_class" xsi:type="string">header links</argument>
</arguments>
</block>
</referenceContainer>
第 2 步:定义模板
与上一步一样,Bss 主题使用位于目录中的下拉菜单来识别模板:
<Magento_Customer_module_dir>/view/frontend/templates/account/customer.phtml
<?php if($block->customerLoggedIn()): ?>
<li class="customer-welcome">
<span class="customer-name"
role="link"
tabindex="0"
data-mage-init ='{"dropdown":{}}'
data-toggle="dropdown"
data-trigger-keypress-button="true"
data-bind="scope: 'customer'">
<span data-bind="text: customer().fullname"></span>
<button type="button"
class="action switch"
tabindex="-1"
data-action="customer-menu-toggle">
<span><?php /* @escapeNotVerified */ echo __('Change')?></span>
</button>
</span>
<script type="text/x-magento-init">
{
"*": {
"Magento_Ui/js/core/app": {
"components": {
"customer": {
"component": "Magento_Customer/js/view/customer"
}
}
}
}
}
</script>
<?php if($block->getChildHtml()):?>
<div class="customer-menu" data-target="dropdown">
<?php echo $block->getChildHtml();?>
</div>
<?php endif; ?>
</li>
<?php endif; ?>
第 3 步:扩展基本布局以添加块
在 Bss 主题中创建扩展布局文件。
app/design/frontend/Bss/default/Magento_Theme/layout/default.xml
<?xml version="1.0"?>
<page xmlns:xsi="http://www.w3.org/2001/XMLSchema-instance" xsi:noNamespaceSchemaLocation="urn:magento:framework:View/Layout/etc/ page_configuration.xsd">
<body>
<referenceContainer name="header.panel">
<block class="Magento\Framework\View\Element\Html\Links" name="header.links">
<arguments>
<argument name="css_class" xsi:type="string">header links</argument>
</arguments>
</block>
</referenceContainer>
</body>
</page>
第 4 步:移动链接
要将链接移动到块 header.links,我们需要将扩展布局文件添加到主题中:
应用程序/设计/前端/Bss/default/Magento_Customer/layout/default.xml
<?xml version="1.0"?>
<!--
/**
* Copyright © Magento, Inc. All rights reserved.
* See COPYING.txt for license details.
*/
-->
<page xmlns:xsi="http://www.w3.org/2001/XMLSchema-instance" xsi:noNamespaceSchemaLocation="urn:magento:framework:View/Layout/etc/page_configuration.xsd">
<body>
<referenceBlock name="header.links">
<block class="Magento\Customer\Block\Account\Customer" name="customer" template="Magento_Customer::account/customer.phtml" before="-"/>
<block class="Magento\Customer\Block\Account\AuthorizationLink" name="authorization-link-login" template="Magento_Customer::account/link/authorization.phtml">
<arguments>
<argument name="sortOrder" xsi:type="number">10</argument>
</arguments>
</block>
</referenceBlock>
<move element="header" destination="header.links" before="-"/>
<move element="register-link" destination="header.links"/>
<move element="top.links" destination="customer"/>
<move element="authorization-link" destination="top.links" after="-"/>
</body>
</page>
接下来,清除缓存并获取结果:

第 5 步:使用 Css 设置下拉菜单样式
在Bss主题的文件夹中,创建文件:app/design/frontend/Bss/default/web/css/source/ _extend.les
//
// Common
// ______________________________________________
& when (@media-common = true) {
.header.panel .header.links {
.customer-welcome + .authorization-link {
display: none;
}
}
}
//
// Mobile
// _____________________________________________
.media-width(@extremum, @break) when (@extremum = 'max') and (@break = @screen__m) {
.customer-name,
.customer-welcome + .authorization-link {
display: none;
}
}
//
// Desktop
// _____________________________________________
.media-width(@extremum, @break) when (@extremum = 'min') and (@break = @screen__m) {
.customer-welcome {
.lib-dropdown(
@_toggle-selector: ~'.action.switch ',
@_options-selector: ~'.customer-menu .header.links',
@_dropdown-actions-padding: 0,
@_icon-font-text-hide: true,
@_icon-font-size: 22px,
@_icon -font-line-height:22px,
@_dropdown-list-min-width:160px,
@_dropdown-list-item-hover:transparent,
@_dropdown-list-pointer-position:right,
@_dropdown-list-position-right : 0
);
Li{
a{
.lib-link( @_link
-color: #333,
@_link-text-decoration: none,
@_link-color-visited: #333,
@_link-text-decoration-visited: none,
@_link-color-hover: #333,
@_link-text-decoration-hover:none,
@_link-color-active:#333,
@_link-text-decoration-active:none
);
display: block;
line-height: 1.4;
padding: 8px;
}
}
.action {
&.switch {
background: transparent;
border: none;
}
}
}
}
第 6 步:运行命令行并检查结果
运行命令:
php bin/magento s:up
php bin/magento setup:static-content:deploy -f
重新加载页面并检查结果:

