联系我们表单为客户提供了一种与您的业务保持联系的简便方法。更重要的是,联系我们表格还有助于让客户放心,有人在倾听他们的查询、投诉和反馈。
因此,在本博客中,我们将向您展示如何在 Magento 2 商店中配置联系我们表单。
I.启用联系我们表格
第 1 步:在管理面板中,选择Stores>Configuration:

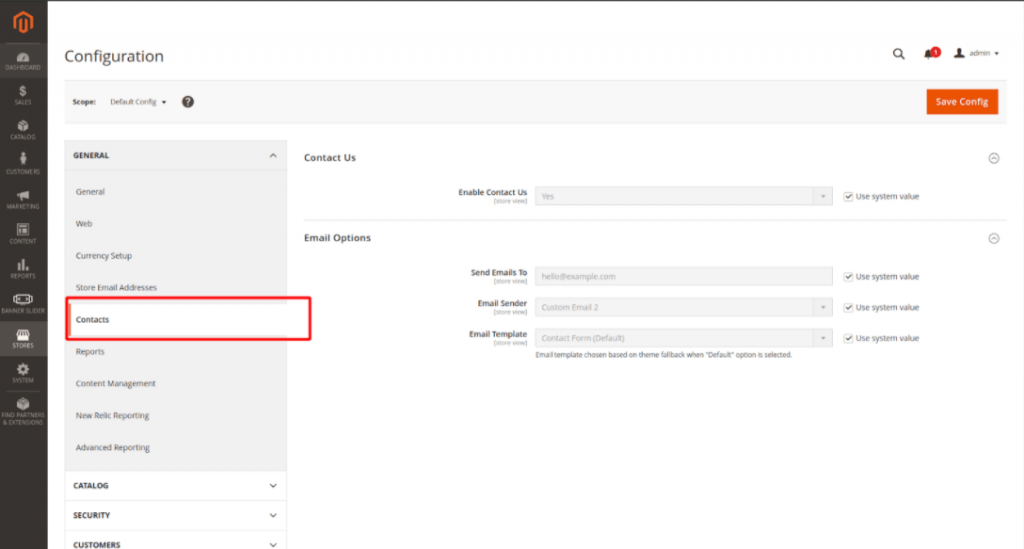
第 2 步:在“常规”选项卡中导航到“联系人”


为字段设置是启用联系我们
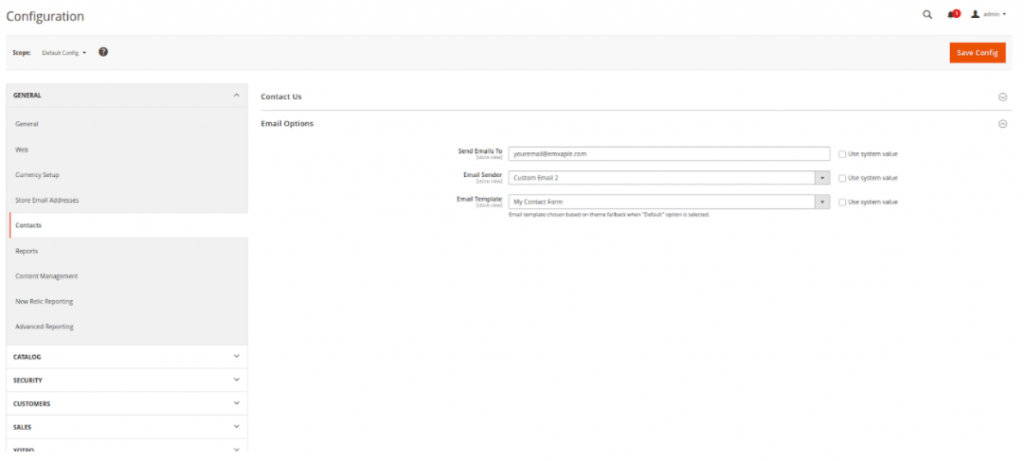
第 3 步:将您的联系电子邮件放入“发送电子邮件至”字段中。在电子邮件发件人选项中选择将在电子邮件中设置的发件人姓名:

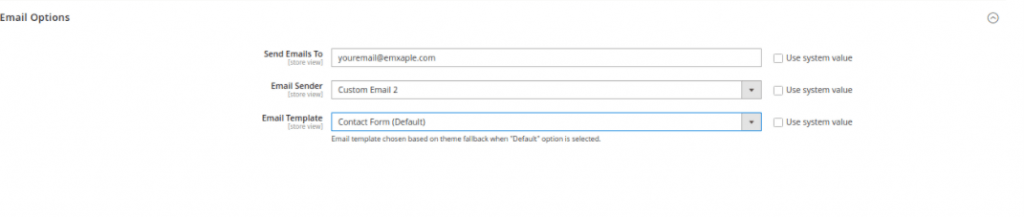
您可以在“电子邮件模板”选项中选择要用于消息的模板。然后点击 保存配置按钮
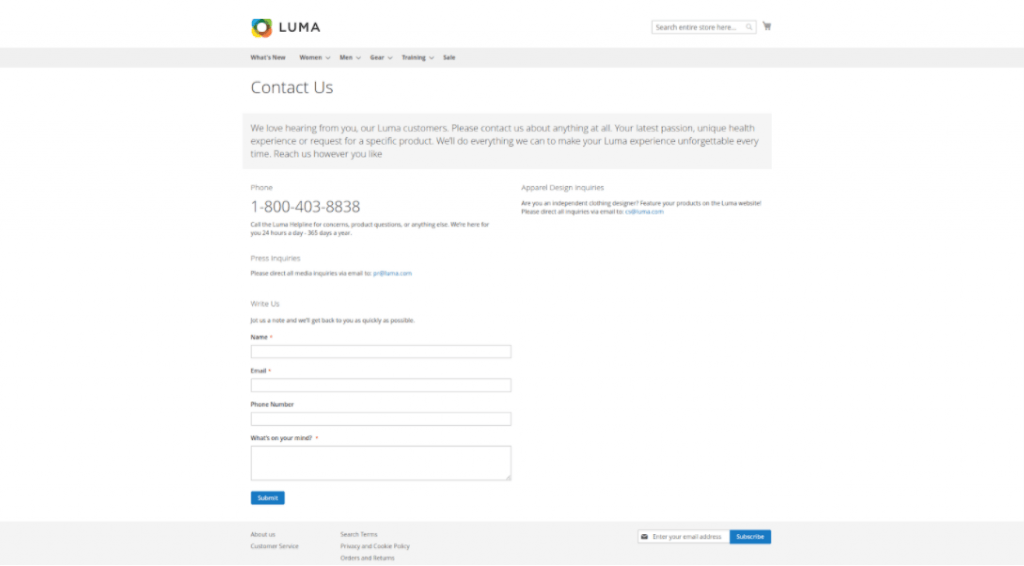
第 4 步:在前端检查结果,查看默认的“联系我们”表单是否已显示:

II.配置联系我们表格
第 1 步:转到内容>块:

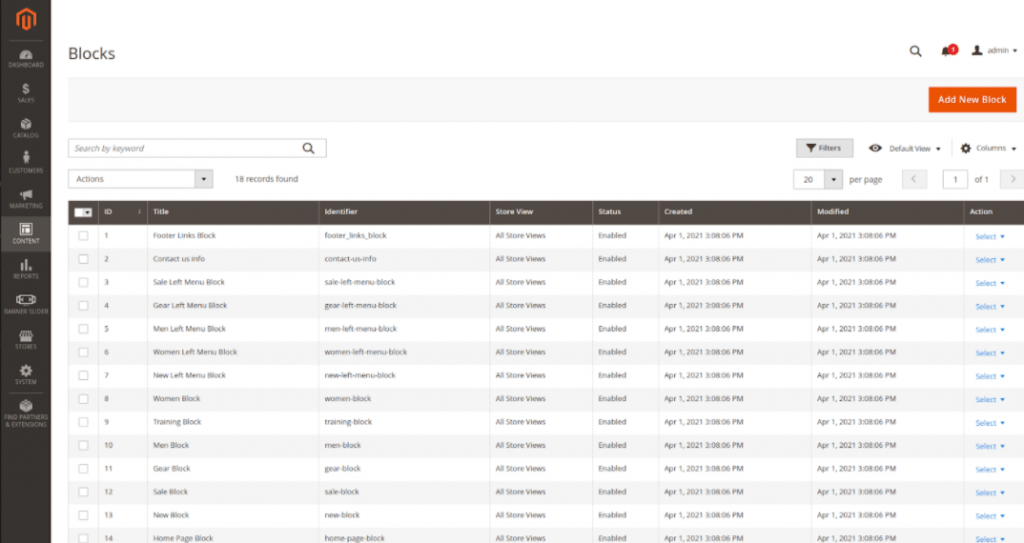
第 2 步:找到带有 Title Contact us info的块,然后在 Select 下拉菜单中选择Edit :


您可以通过在内容框中输入您的联系信息并保存块来自定义您的联系我们表单。
第 3 步:将CAPTCHA添加到“联系我们”表单
转到商店 > 配置 > 客户 > 客户配置

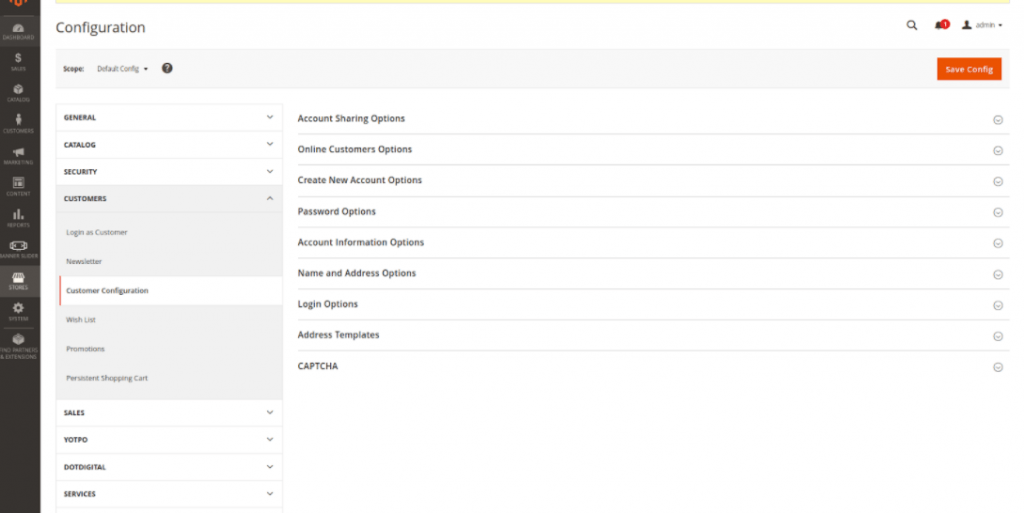
在选项卡验证码中
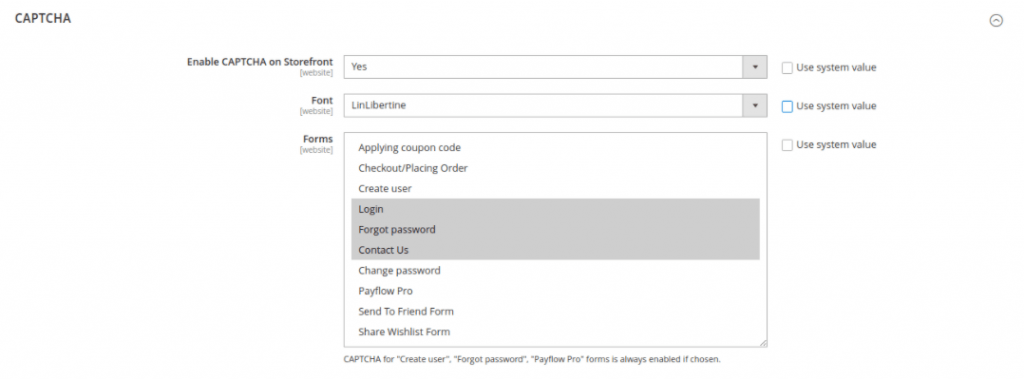

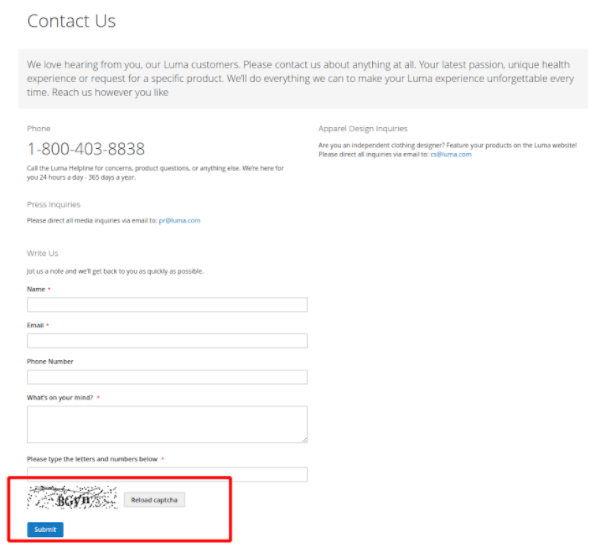
将“在店面启用验证码”字段设置为“是” 。然后为字段表单选择联系我们以在此表单上添加验证码。之后单击“保存配置”按钮。StoreFront 中的结果:CAPTCHA 将添加到您的联系我们表单中:

III.自定义电子邮件联系表
第 1 步:在 app/code/YourVendor/YourModule/view/frontend/templates 中创建文件 form.phtml。您可以在下面查看我们的示例代码:
<form class="form contact"
      action="<?= $block->escapeUrl($block->getFormAction()) ?>"
      id="contact-form"
      method="post"
      data-hasrequired="<?= $block->escapeHtmlAttr(__('* Required Fields')) ?>"
      data-mage-init='{"validation":{}}'>

    <fieldset class="fieldset">
        <legend class="legend"><span><?= $block->escapeHtml(__('Write Us')) ?></span></legend><br />
        <div class="field note no-label"><?= $block->escapeHtml(__('Jot us a note and we’ll get back to you as quickly as possible.')) ?></div>
        <div class="field name required">
            <label class="label" for="name"><span><?= $block->escapeHtml(__('Name')) ?></span></label>
            <div class="control">
                <input name="name" id="name" title="<?= $block->escapeHtmlAttr(__('Name')) ?>" value="<?= $block->escapeHtmlAttr($this->helper('Magento\Contact\Helper\Data')->getPostValue('name') ?: $this->helper('Magento\Contact\Helper\Data')->getUserName()) ?>" class="input-text" type="text" data-validate="{required:true}"/>
            </div>
        </div>

       <--New field customize-->
        <div class="field subject required">
             <label class="label" for="subject"><span><?php /* @escapeNotVerified */ echo __('Subject') ?></span></label>
             <div class="control">
                  <input name="subject" id="subject" title="<?php /* @escapeNotVerified */ echo __('Subject') ?>" value="" class="input-text" type="text" data-validate="{required:true}"/>
             </div>
        </div>

        <div class="field email required">
            <label class="label" for="email"><span><?= $block->escapeHtml(__('Email')) ?></span></label>
            <div class="control">
                <input name="email" id="email" title="<?= $block->escapeHtmlAttr(__('Email')) ?>" value="<?= $block->escapeHtmlAttr($this->helper('Magento\Contact\Helper\Data')->getPostValue('email') ?: $this->helper('Magento\Contact\Helper\Data')->getUserEmail()) ?>" class="input-text" type="email" data-validate="{required:true, 'validate-email':true}"/>
            </div>
        </div>

        <div class="field telephone">
            <label class="label" for="telephone"><span><?= $block->escapeHtml(__('Phone Number')) ?></span></label>
            <div class="control">
                <input name="telephone" id="telephone" title="<?= $block->escapeHtmlAttr(__('Phone Number')) ?>" value="<?= $block->escapeHtmlAttr($this->helper('Magento\Contact\Helper\Data')->getPostValue('telephone')) ?>" class="input-text" type="text" />
            </div>
        </div>

        <div class="field comment required">
            <label class="label" for="comment"><span><?= $block->escapeHtml(__('What’s on your mind?')) ?></span></label>
            <div class="control">
                <textarea name="comment" id="comment" title="<?= $block->escapeHtmlAttr(__('What’s on your mind?')) ?>" class="input-text" cols="5" rows="3" data-validate="{required:true}"><?= $block->escapeHtml($this->helper('Magento\Contact\Helper\Data')->getPostValue('comment')) ?></textarea>
            </div>
        </div>

        <?= $block->getChildHtml('form.additional.info') ?>
    </fieldset>

    <div class="actions-toolbar">
        <div class="primary">
            <input type="hidden" name="hideit" id="hideit" value="" />
            <button type="submit" title="<?= $block->escapeHtmlAttr(__('Submit')) ?>" class="action submit primary">
                <span><?= $block->escapeHtml(__('Submit')) ?></span>
            </button>
        </div>
    </div>
</form>
第 2 步:接下来,在 app/code/YourVendor/YourModule/view/frontend/layout 中创建contact_index_index.xml以用新的 form.phtml 文件覆盖之前的form.phtml文件。看看我们下面的示例代码:
<?xml version="1.0"?>
<page xmlns:xsi="http://www.w3.org/2001/XMLSchema-instance" layout="1column" xsi:noNamespaceSchemaLocation="urn:magento:framework:View /Layout/etc/page_configuration.xsd">
   <body>
      <referenceBlock name="contactForm" remove="true"/>
       <referenceContainer name="content">
           <block class="Magento\Contact\Block\ContactForm" name= "customContactForm" template="Magenticians_Modulecontact::form.phtml" />
       </referenceContainer>
   </body>
</page>
第 3 步:转到MARKETING > Email Templates并单击Add New Template按钮:

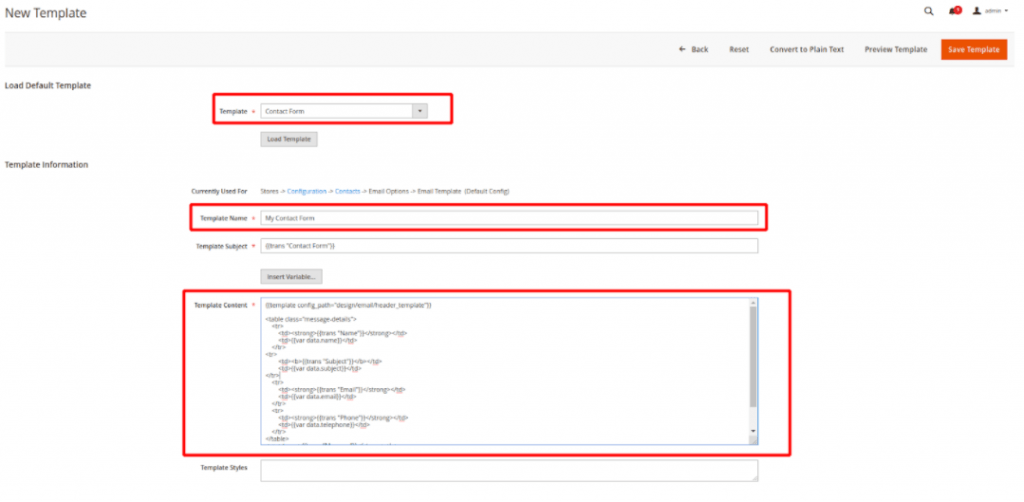
从模板字段中选择联系表格,然后单击加载模板按钮。然后单击保存模板按钮。
第 4 步:转到商店 > 配置 > 常规 > 联系人选项卡:

选择您为电子邮件模板字段创建的我的自定义表单。然后单击保存配置。
如果您已正确完成所有步骤,您的结果将是带有新字段主题的联系我们表单,如下面的屏幕截图:


